Redesign of the houses
- kt1g19
- Jun 2, 2021
- 6 min read
Updated: Jun 3, 2021
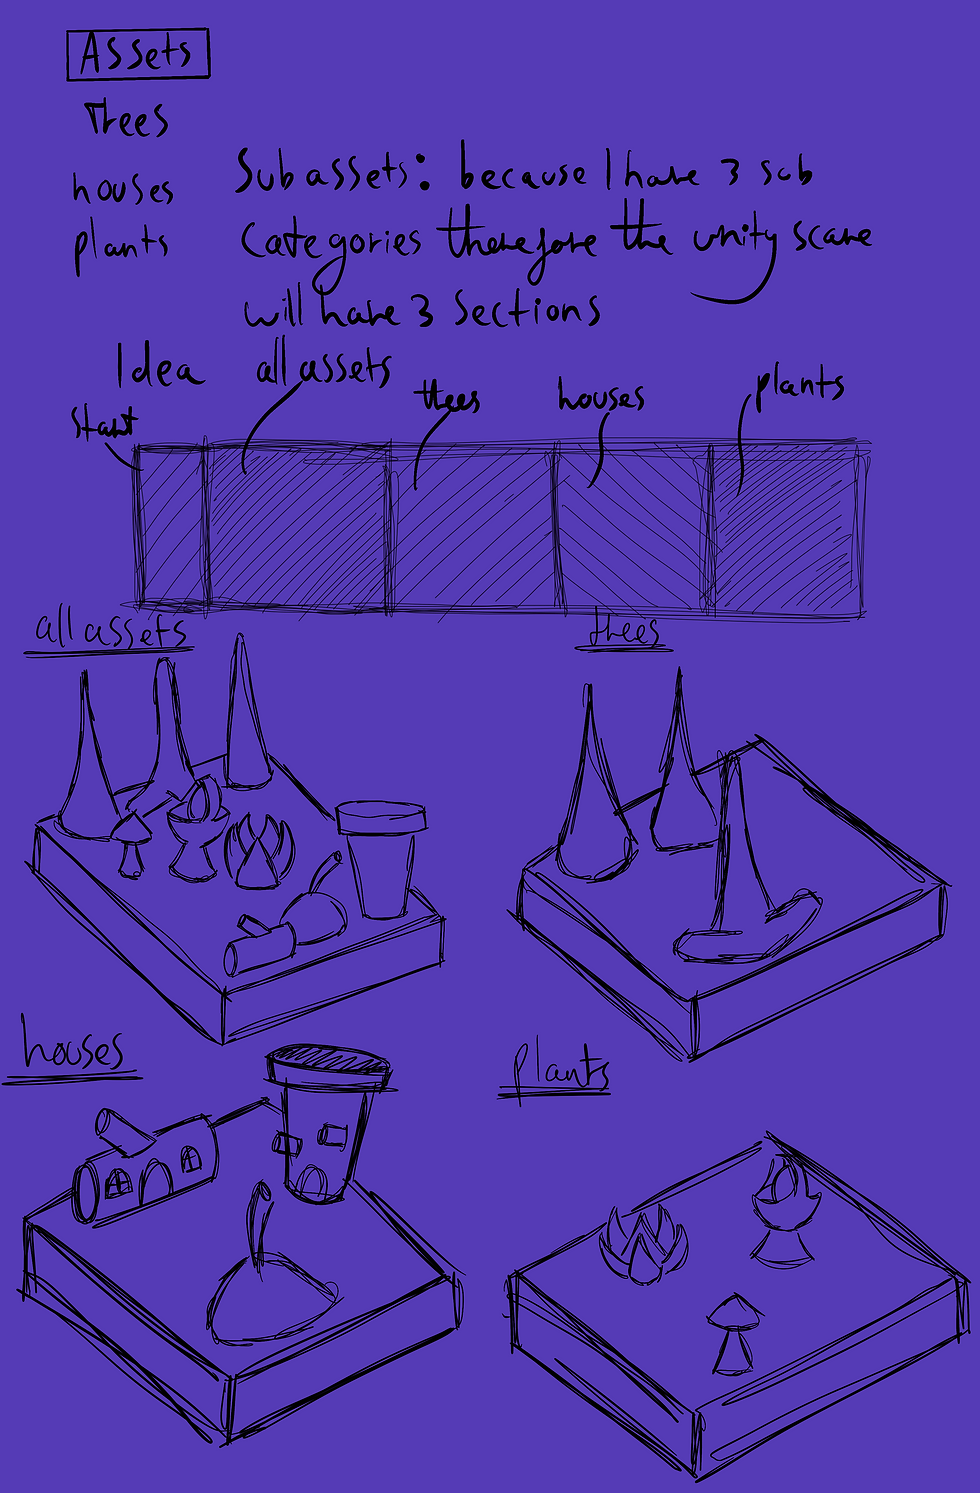
In week 1 I designed three houses which was an inspiration nerices original idea for the houses, for the houses I made a rendered photo of what it might look like in the game, but the problem was that in solid the houses looked bland, and it isn’t something I want to show in my asset collection. Also after having the chat with James I realised that I have to asset test my assets, this is something that I haven’t really considered at this point in the project, so this means that I would have to go back to previous posts and asset test the assets. In my reflection I discussed how I am going structure the blogs going forward:
Drawing -> digital art -> 3D modelling -> backface culling -> decimate polygons -> unity
But because I have already done the drawing and digital art what I really need to do now is to:
Drawing -> digital art -> 3D modelling -> backface culling -> decimate polygons -> retopology -> substance -> unity
Tree house
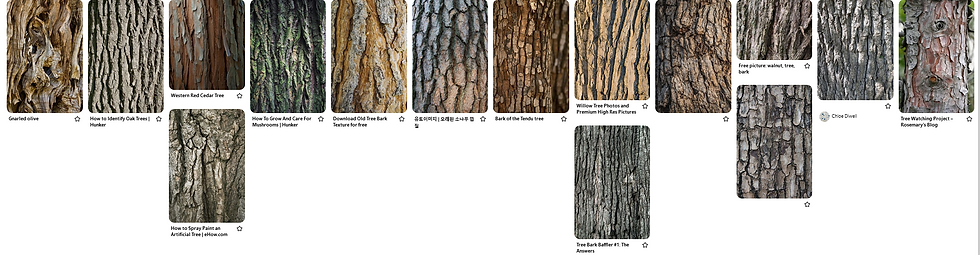

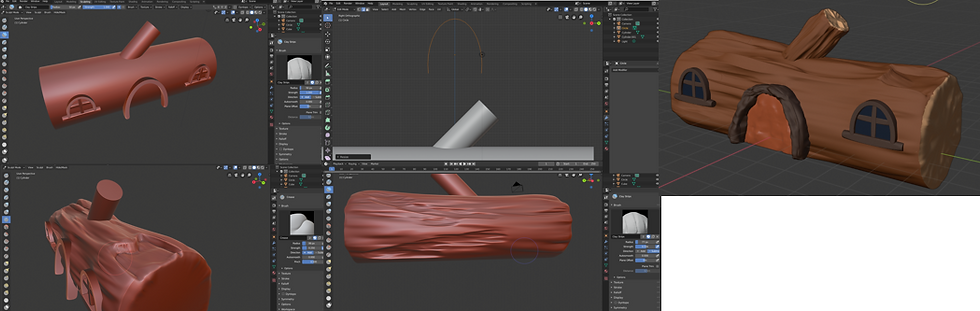
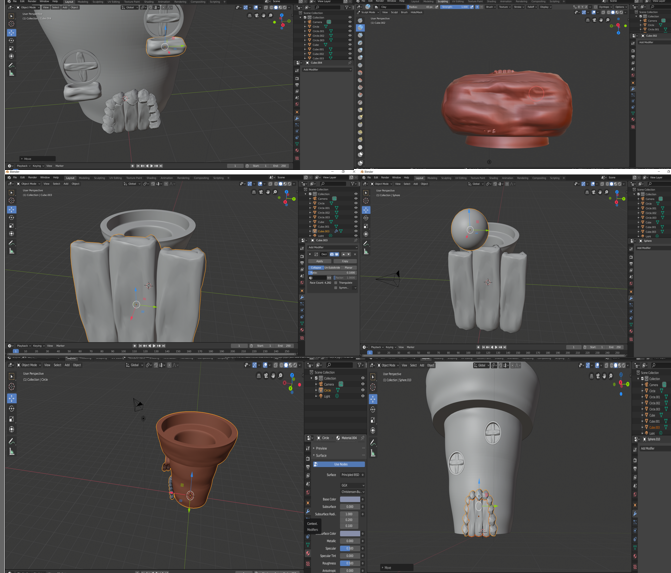
First, I made a mood board of barks, the pictures of the barks looked they were raised into strips and there were of three underneath it, so the goal for this redesign is to make the house look not just only a tree stump, but the stump has too old so it’s important for the design to have really high tree bark to convey its age. In blender I used 2 cylinders (one facing at its side by R+X+90, and the other diagonally by R+X+45) to make the basic shape of the house, after that I added 2 circles and deleted the other half then I pressed S+Z to elongate it to make the door way and I used the same shape for the windows, and after all that was completed I added three planes, two for the window, and one for the door. Now I got the basic shape of the houses, I need to sculpt it, I first started with the cylinders and used the clay strips first (the radius was 90 px, and the strength was 0.55), I used the clay strips as role fillers where I can put the bark in, after I did that did the same thing but raised the clays into stripes so that it could look more like tree barks. I tried doing the same to the door, but my computer became really laggy, so I decimated the cylinders polygons in order for my laptop to run a bit more smoothly. For the outer edges of the cylinder I used the crease in order to create the thin gaps in the wood. When it came to colours I wanted the tree to be of a lighter tone of brown so it wouldn’t look too harsh in unity, so made a chocolate brown for the outer tree stump and the door, dark chocolate brown for the windows and dark cream for the inner tree stump.
Chocolate brown:
H 0.075
S 0.930
V 0.535
A 1.000
Dark chocolate brown:
H 0.048
S 0.745
V 0.299
A 1.000
Dark cream:
H 0.078
S 0.419
V 0.906
A 1.000
Achorn house
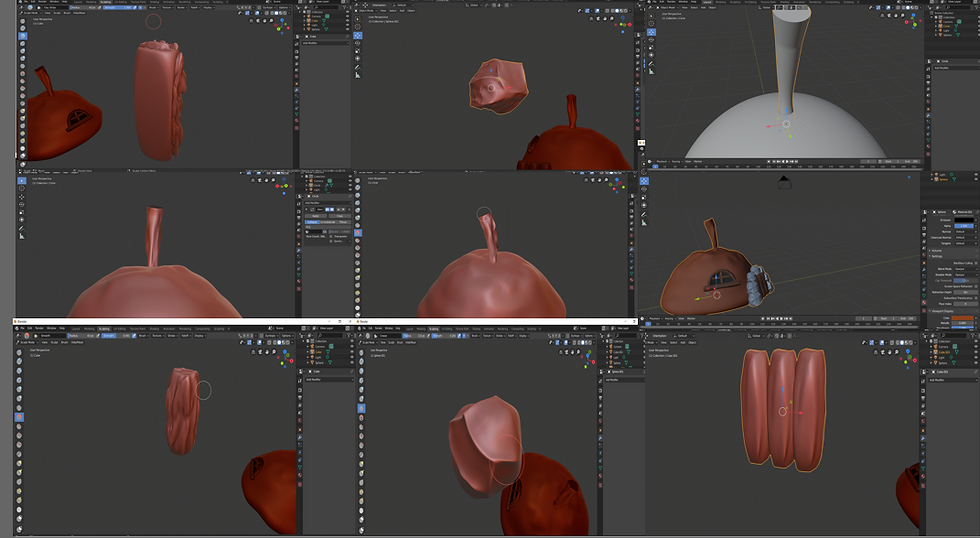
For the achorn house what I did first was adding a UV sphere than using shader smooth. After that I used the subdivision surface to increase polygons in order to make the sculpt mode detailed. Similarly, to the tree house I used the clay strips all around the sphere (it was 50 px + radius, and the strength is 1.000). For the little tail on the top I used a circle elongated it towards the side, after that I subdivided it and used the clay strips for this as well and then I decimated both the sphere and the tail. I added a circle and deleted the half of the circle in order to create a window. To make the door I added a cube and subdivide it, after that I used the clay and clay strips to make the barks of the wood (the radius was 43 px+- and the strength was 0.491), the rock needed a face on each side, after that I used the crease tool to crease the edged of the faces and also to show the cracks in the in the rock (the crease radius was 115 px+, and the strength was 0.250), because there were so many faces in the rocks I had to decimate it to 0.4.

Chocolate brown:
H 0.048
S 0.812
V 0.513
A 1.000
Dark chocolate brown:
H 0.056
S 0.734
V 0.401
A 1.000
Black:
H 0.000
S 0.000
V 0.150
A 1.000
Dark blue grey
H 0.630
S 0.257
V 0.717
A 1.000
Pot house
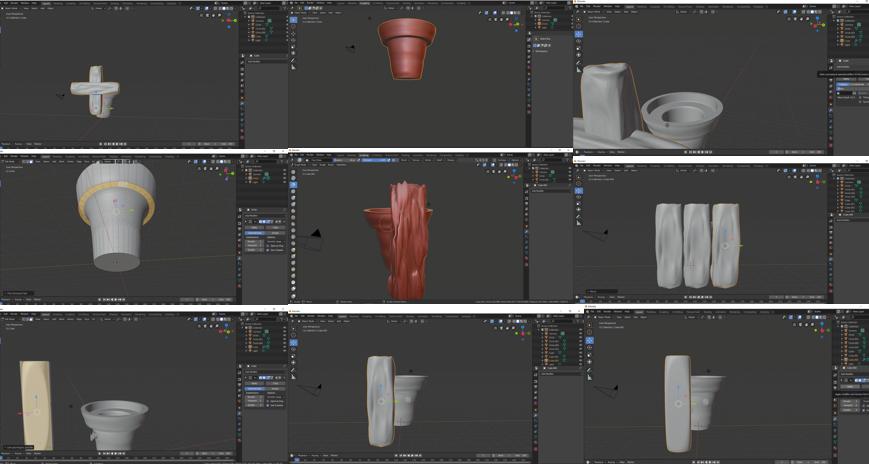
Finally, the pot house, firstly I added a circle then elongated it to the shape of a pot, then I subdivided it. Then went into a sculpt mode used the clay to put bombs into the sculpture, after the main pot was made, I made two more on the side to make the two windows. Added two cube and put them together in a cross and subdivided it and used clay strips to create the wooden beams for the windows. Added two cubes and put them together in a cross and subdivided it and used clay strips to create the wooden beams for the windows, (the clay strips radius was 5 px+-, and the strength was 1.000) decimated the beams to 0.1 when it came to the same thing essentially, elongated it then subdividing it, after that I used the clay strips to make the bark of the wood (clay strip radius was 56px +-, and the strength was 1.000), then I duplicated twice to make the door. I did the same thing the flower beds
Chocolate brown:
H 0.038
S 0.699
V 0.658
A 1.000
Dark chocolate brown:
H 0.043
S 0.660
V 0.438
A 1.000
Dark blue:
H 0.628
S 0.393
V 0.294
A 1.000
Light blue:
H 0.631
S 0.197
V 0.663
A 1.000
Retopology
When it came to the retopology of the tree house I started with a plane and use the skin wrap modifier so that the plane can wrap around the tree, I did it with an offset of 0.02 N use the magnet tool with project individual faces and then I stretch the plane so it can cover the rest of the other parts of the tree, in the duration of four days I was retpologising the entire tree and when I say retopologise the tree I covered the entire tree excluding the door, windows and the tree, and the reason why I wasn’t able to retopologise the entire tree was because I face a bit a problem that I had to solve, despite the retopology process was going along successfully I couldn’t figure out how to retopologise the door and window because whenever I got the vertices close to the window, it will go somewhere else, this was affecting my mood because I was so irritated and it was also affecting the time that I had left. But I found a solution, I kept skin wrapping to the retopology plane but what I should have been doing was to skin wrap to the original model and then get rid of the excess polygons. So I added a cube and stretched it and cut two faces, stressed those and aligned, to make it look like the window, and did the same thing for the door.
For the pottery house this one is a little bit more simpler cause I used the same technique I did for tree house, I put a cylinder over the Pothouse and skin wrapped it with an offset of 0.03 MI did the same for the window and for the doors I skin wrapped a plane and a cube for the key by stretch it to make it look like the door.

Retopology problem
Like I said in previous in the previous blog that I had a problem with the retopology, this is where I misunderstood the understanding of retopology and it affected all my other assets, unfortunately due to time constraints I was not able to retopologise the houses because of the time frame. I had felt like it wasn't feasible for me to retopologise all my assets so I decided just to selectively rent apologise the trees and plants that I made as I believe that the trees and the plants were more important than the houses that, I made but later on instead of putting my assets into unity scene I made a render of my assets in blender I talk more in depth about this in a blog called vertical slice pictures.
Unity testing
Though I have finished all the 3D models of the houses I still need to make sure that the assets would be really for I to be transferred in the game to do that I have to transfer my assets into unity and see how it would look in the game engine. These are my first attempts of the assets being transferred into unity, as you can see there are many problems of the 3D models:
· The pot house is far too small
· Some of the colours in the treehouse aren’t there
· There is a backface culling in the windows there also backface culling in the tail and window in the achorn house
· The achorn house is way too small
As you can see the assets were not ready, here is what I did to rectify that:
· I appended some of the other houses so I can get a reference to how big it will look, I made it bigger
· I didn’t include the colours in the base colours, or the subsurface colour I changed to its right colour
· I Solidified the 3D model
· I appended the tree house to the achorn house to get better reference for height, I now made it the same height as the tree house
Now because the heights are now correct, and there are no longer any backface culling. The house assets are ready

References
Thomas, K., 2021. 15 Bark reference moodboard ideas in 2021 | tree bark, tree bark texture, tree textures. [online] Pinterest. Available at: <https://www.pinterest.co.uk/kaiathomas00/bark-reference-moodboard/> [Accessed 3 June 2021].
Comments