Design of the trees
- kt1g19
- Jun 2, 2021
- 11 min read
Updated: Jun 3, 2021
Design of the trees
A couple weeks ago I made some rough designs of trees that we can use for a game, it appears to me that the most popular trees were the ones that had a gradient tool that includes the pine trees and the mushrooms.
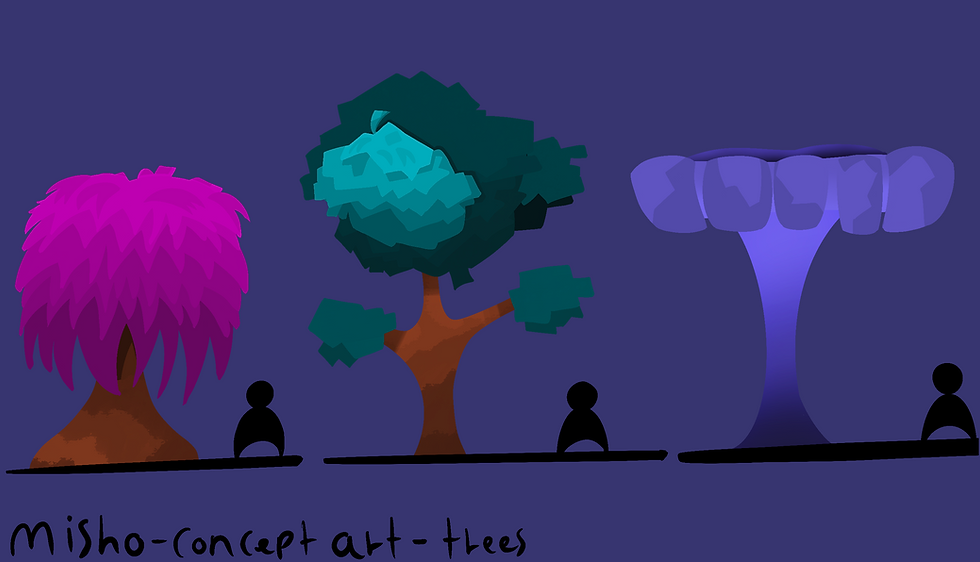

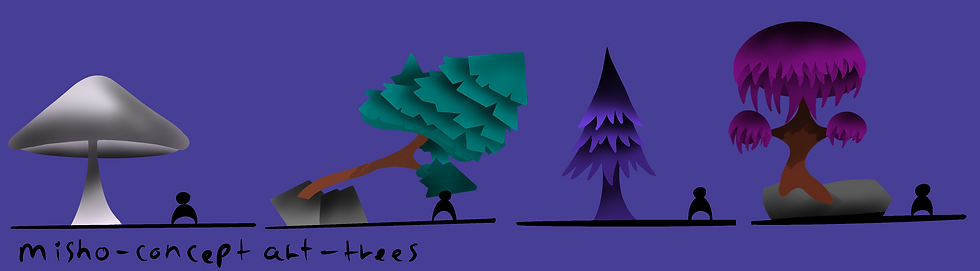
I had a discussion with Phil about what sort of trees that he wanted, and he discussed that he wanted a title screen of Misho.
He wanted a picture of misho coming out of one of the houses and trees surrounding the house but he wanted these trees to have and red and blue colour palette to them. A lot of previous designs of the trees looked somewhat cartoony, this is because they were rough designs but still they wouldn’t really fit with the art style that were going for as a team, the art style that were going for this project is realism. So, having cartoony trees wouldn’t really fit with the style nor the tone of the game. This would mean that I have to design the props of the environment more realistically. When it comes to sculpting I’m not that confident with it, I have used the sculpt mode a couple of times for the self-improvement project, but I never really used it for the projects really until now so albeit little bit of a challenge for me but I think I can do it.
So, this blog will be structured is process of 3D modelling, showing the final result of the 3D modelling, decimate the polygons, retopology, but it into substance and then into unity to change the sizes if it needs any.
I think I’ll be creating 3 to 4 trees because the game will take place in a most and the trees will most likely copy and paste the same trees, so I don’t necessarily need to create 10 or 20 trees due to the time limit that I have I think will be a lot more beneficial if I just limit to 3 - 4 designs.
In order for me to create an effective design of the trees I need to look at real life references for tree barks. So, what I did first was good to my local pond and take pictures of trees.
here’s what I’ve taken the pictures are close-ups of trees the trees seem to have a grey-brown colour and the love the trees that appeared to be ageing have the more older the tree is the in the bottom part of the trees it seems like seems like stumps stops going out in different directions that something are taken from the pictures as well. After I made a bottle trees, I began creating the trees in blender
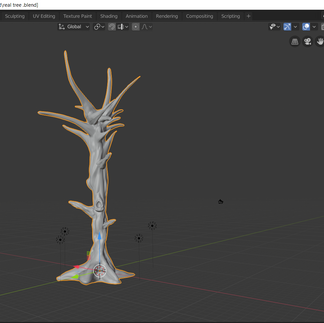
Tree one
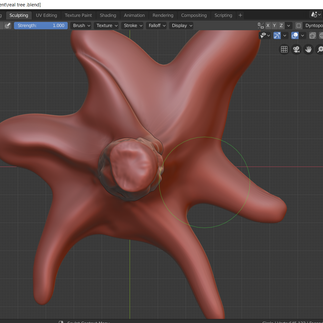
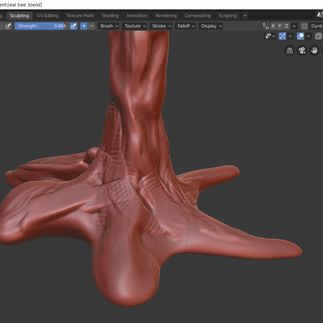
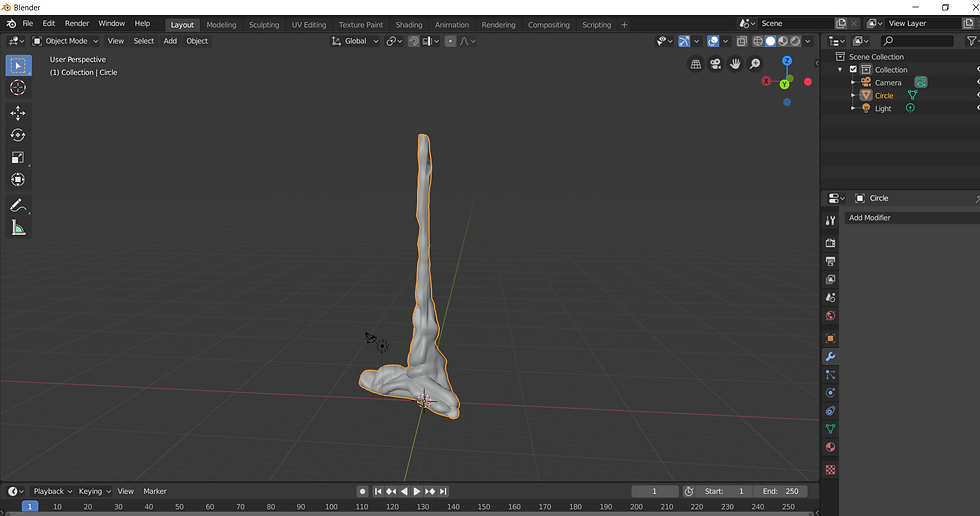
First I created a circle by using the up arrow + A key, then I decimated the sides of the cycle to 5 so look like a heptagon. After that I elongated circle to look like a solid object and cut the faces to about 10 sides are downwards this would give me a lot more flexibility when it comes to the sculpting, after that I elongated the circle so it would look like a rod after that was completed I cut the faces into 20 and subdivided it to make the model more smooth and have more polygons to the model this will give me a lot more flexibility when I go into sculpt mode. I went into sculpt mode and use the clay strips with a radius of 19 and the strength of 0.904 to create the layers of bark, this resulted the tree to have bumps in them, after that I used the crease tool on the edges, to make the edges more defined as a bit more clay strips so that the model more detailed, used the stretched tool to create the multiple routes going different directions. But I had a bit of a problem because the tree was so detailed with so many polygons in the tree it started affecting the speed of the blender, it started moving very slowly so what from then was to decimate the polygons to 0.1 so that the speed of my laptop can run more smoothly.

Tree two
First I made a circle by using the up arrow and a key and decreased to 5 sides do it would look like a heptagon, after that I solidifies the circle by pressing F and the elongated it do it would like a solidified and I did that by pressing E. When it came to process behind creating the sculpt it was more a less the same with creating the previous sculpt, I used the clay strips for the bark and after that I used the crease tool to sharpen the edges, at the top of the sculpt I grabbed each side for the branches.
Claystrips radius 26 px
Claystrips strength 0.90
Grabtool strength 36 px
Grabtool strength 1.000
I wasn’t particularly happy with the look of details of the sculpt so I subdivided it, although it worked and it was successful in the sense that it made sculpt more detailed, it made the process of the 3D model quite slow because of the amount of polygons that were increased due to the subdivision, I fixed it by decimating the polygons


Tree three
Sam with tree one and two I first used the circle and elongated so it would like a shape and height of the tree. In sculpt made used the claystrips to make the bark and used the grabtool to create the branches
Claystrips radius 26 px
Claystrips strength 0.904
Grabtool strength 29 px
Grabtool strength 1.000

Creating the leaves
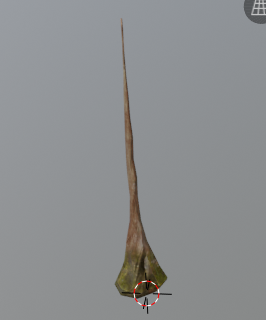
Similarly to the trees I made a shape using the up arrow and a key but instead of using a circle I used a phone instead, went into edit mode and deleted the other side of the plane, after that I elongated the vertices and spread them to different directions so it would like a branch. Then I used the skin tool to solidify the branch, once that was done, I used the shade smooth to make the edges less defined and then used the subdivision to smoothen it. After that I got another plane and cut it to make three polygons and increased the sizes so it would look like a diamond, after that I copy and pasted the leaves. One the branch was created I copy and pasted it in both sides it would look like a bush. Then I put on all the branches on the tree.

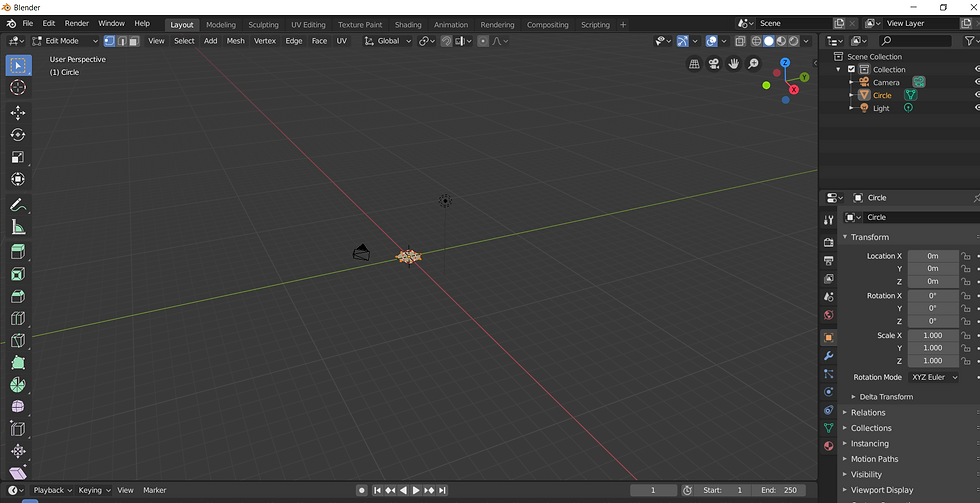
Retopologising
When it comes to retopology I am a bit new to it so I looked at a lot of retopology videos, and most of the retopology videos consist of using one plane to create the entire low poly model I wasn’t particularly enthusiastic doing this until I found retopology technique video. The video was called ‘Retopology a detailed guide – part 2 – techniques’ by grant abbitt, the video was discussing different retopology techniques and one of them include grant using a cylinder to skin wrap around the neck, this technique is a good short cut because I can just add a cylinder, cut the faces and skin wrap it around the detailed tree model, so it can so that the cylinder can wrap around the tree. My first attempt was to use this technique in tree one, I added the cylinder and cut the faces to 10 after that I used the skin wrap and moved the offset 0 0.05m. There was still a lot of the tree that was sticking out but every time I moved the polygons slightly and it would move the somewhere else where I didn’t intend to, so in order to fix this I went back onto sculpt mode and smoothen the edges, after that the vertices behaved themselves. For tree two I used the cylinder at the bottom of the tree so that the vertices wouldn’t stick onto any other objects, I moved the vertices around so that the tree wouldn’t slow. I added another cylinder at the top part of the tree, but the vertices started to stick, so I deleted the faces and joined them together. I did the same thing for the other tree.
Retopology problem
After completing the retopology of the trees I put my work into substance, substance is where I created the materials for the game. My first attempt of me using substance I thought it went very well for the lack of time that I had with it, but when I went back onto blender and added the principal setup so I can put the textures in all went wrong, the texture didn’t appear for some reason. And apparently the retopology was wrong, I didn’t uv wrapped it and I didn’t mark any seams for the uv wrapping.
Obviously I was overwhelmed with not just trying to fix the trees, but also the amount of assets that I had to clean and texture them. So for help I contacted my teammate Raff and I explained what the situation was, he looked at the edit mode of my low poly model, and there were lots of triangles and edges for a low poly and I didn’t UV wrap it. I used that same technique with the rest of my models so this would mean that if I did this same mistake with the trees, then that would mean I did same things with all of my other models, this would mean that I would have to got back and clean the retopology of the models and then put them into substance.
When I first heard about this news I freaked out because it was only a week away from the deadline the project, and I already had a lot to do came when it comes substance, and now I have to go back and clean everything that I have done, I had an anxiety attack over it I felt incredibly angry at myself because I misunderstood what retopology was about, when retopologising you use squares not triangles, I felt horrible because I felt like I let everyone down and now slow things up when it comes to the process of the of getting these assets done, and considering the amount of time that I have left the comes this project.
I decided I will be a lot more beneficial if I focused on retopologising the trees and mushroom because those are the most important assets to make considering that the title the game is Misho and the Forest of dreams. My teammate Callum lost his work of character sculpting, so that would mean that the environmental work will be the main focus of the vertical slice, this would mean that there will be more pressure for me because I’m in charge of the environments and if I don’t get the environments done then my work won’t be the game.
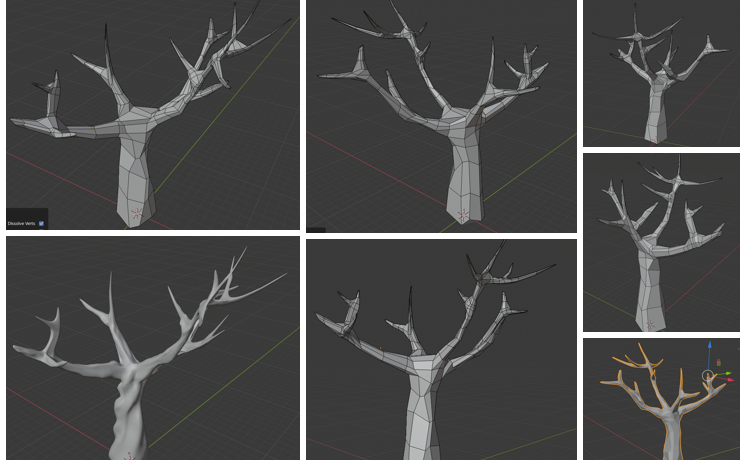
Raff and taught me retopology the right way now, the technique goes a bit like this: in blender you select the vertices by pressing B and dragging along press the right click on your mouse to dissolve edges, after I Raff showed me how to retopologise correctly I did some cleaning of trees and mushrooms, and for the most part the retopology was successful and I fixed most of the problems with the edges and vertices, but there are a couple problems I face along the way, for example when. I was trying to clean the retopology of the tree with the branches but every time I fixed a square and there was a triangle which is something you shouldn’t have in a retopology model this happened all throughout the right apology especially came to the branches so I decided it was to get rid of the branches altogether so basically look like a stump but though I got rid of the branches the problem still commit still Coming up so I decided to disband that tree altogether and my team wanted me to create a new tree which had branches.


After I retopologise the trees I put them into substance with the help with Callum I went back onto blender and the texturing was successful but because I got rid of some of the branches I decided just to make a new tree altogether.
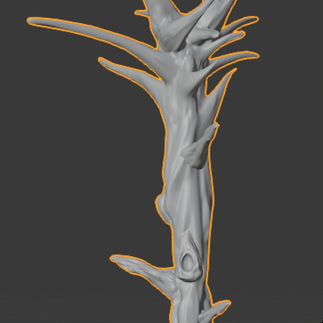
So I followed the blender tutorial of a low Poly tree so I added a cube and I cut the face in half and stretch the edge so look like a hexagon and I use this shape for the stump of the tree, then I stretched it by the top part of the stump to create the branches, after I got the basic shape of the tree I went onto subdivision surface the one on the shade smooth after that I went on to sculpt mode and use the clay strips with brush size 0.38 with a 0.908 strength to raise the dent that I used to look like tree barks.

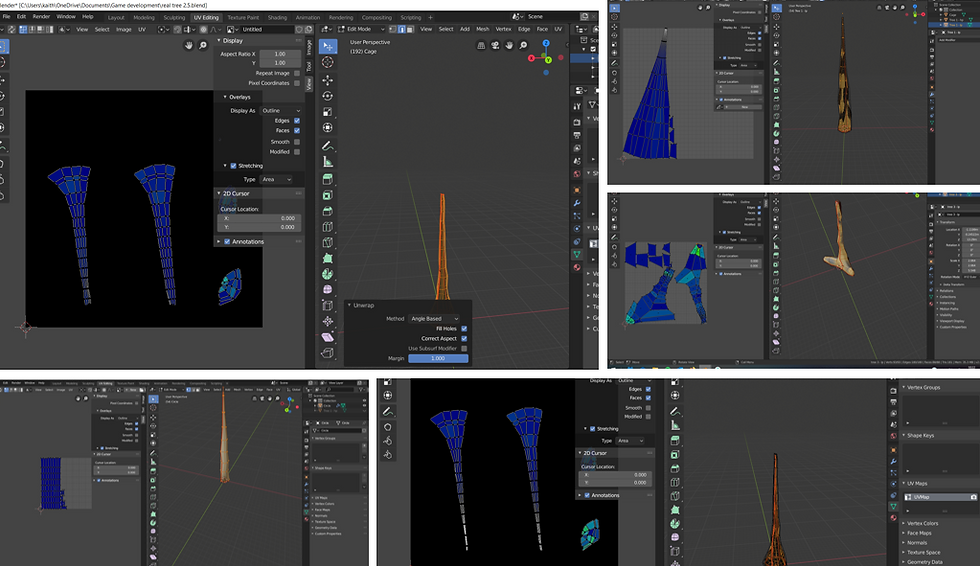
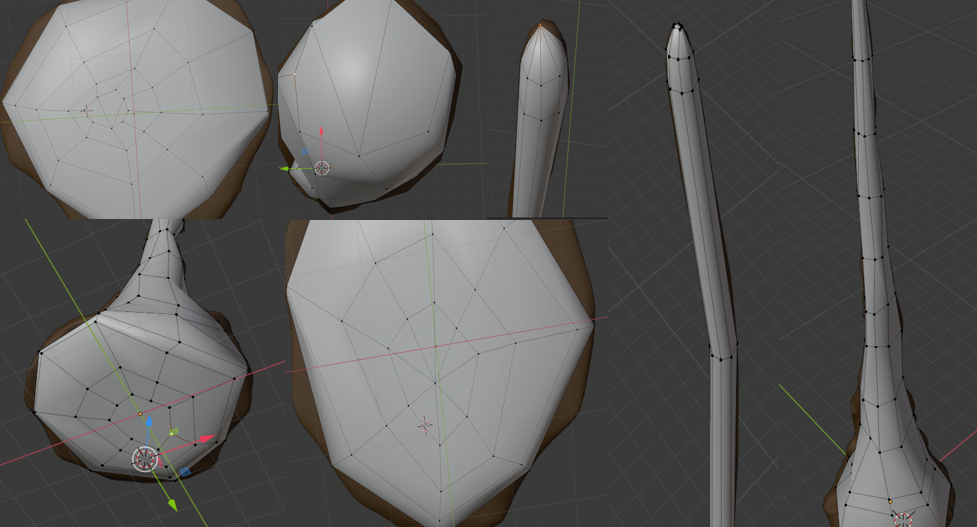
After that I got a 7 sided shape and skin wrapped throughout the stump and the branches of the tree and then joined them together by filling other edges together by pressing F onto each vertices to create a new Polygon, after I made the retopology version of the tree I had to UV unwrap it. My first attempt was to mark seam the stump and then cut the tree in half, but that didn't work because it didn't have all the vertices, so after that I marked seam the branches and the tree stump. The UV mapping as you can see that the UV mapping was successful but because of the time frame I had left I didn't think I was able to put the models into substance and then go back to blender and then put leaves onto that model and then trying to put the finished model into unity so therefore my options were somewhat limited.
On Monday we had a meeting discussing what's going to be happening in the last week of the projects, and who's going to be putting assets into unity, I asked Phil if I could discuss with him some stuff after the meeting, I started with apologising with what's been happening in the last week and I said that I felt in a way I kind of let everyone down because I set up the making big promises about environments and designs and I wasn't able to follow through, Phil said that I didn't let anyone down and it was just one of those things that just unfortunately didn't work and it made, having this discussion with Phil really put me more at ease he started talking about what I could do in putting the assets into the game. Callum pointed out in one of our discussions that if I put the high Poly 3D models onto into unity, it will crash and considering the amounts of days that we have, I didn't want to put the 3D models into unity.
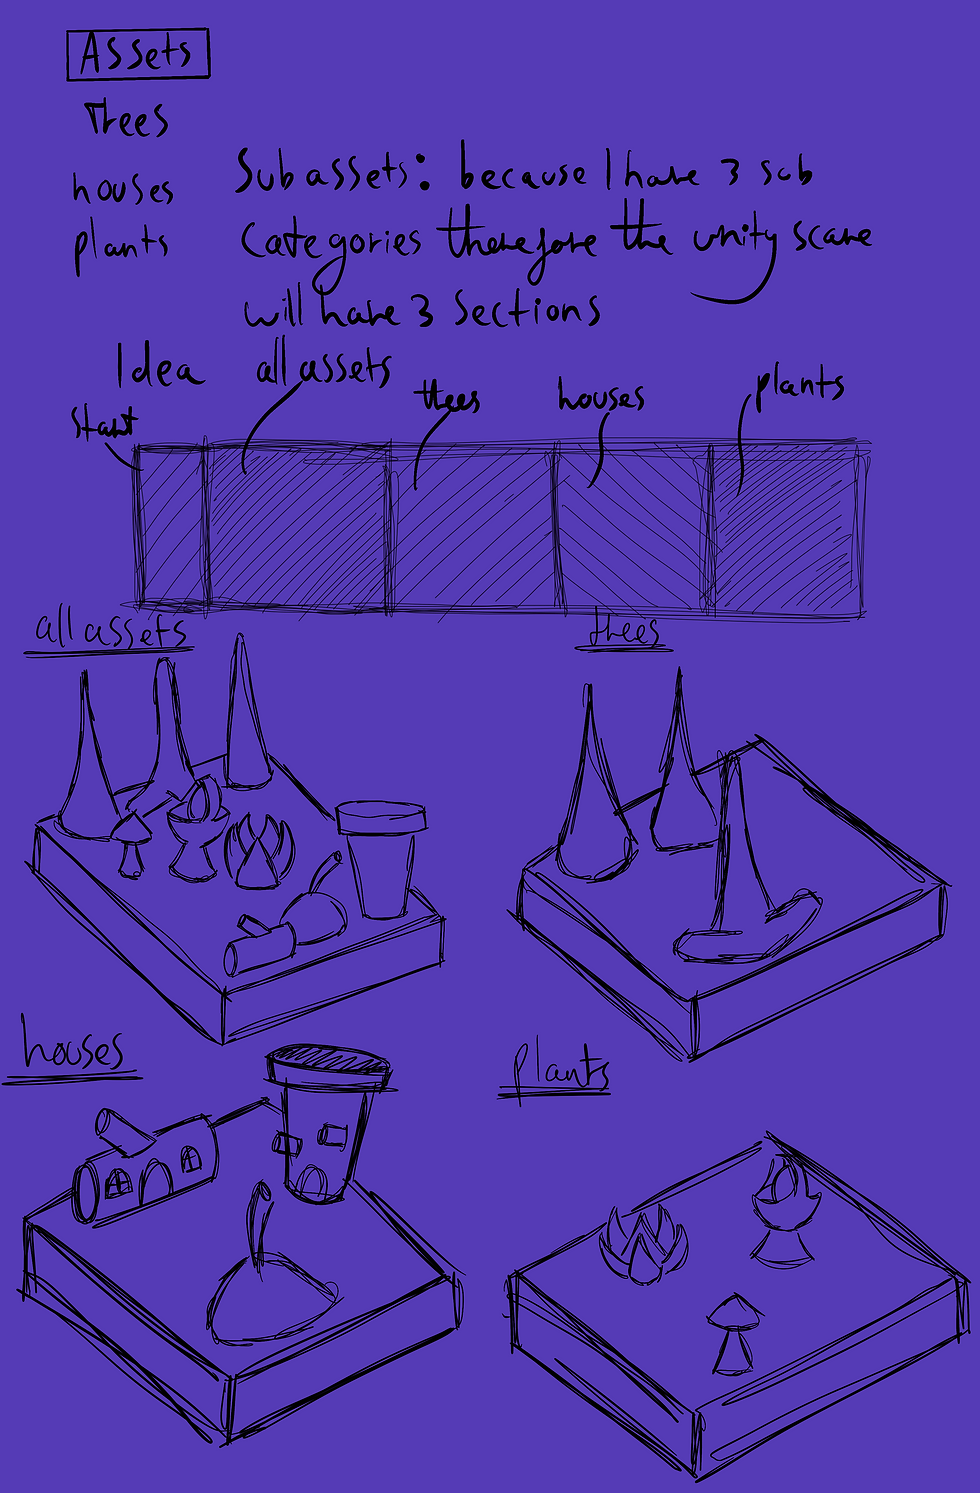
Now that we established that having high Poly 3D models will break the game there will be even more problems than there was before, so instead I suggested is that I can have a rendered image of all my assets in blender and 3D modelling environment, I want to break them down to different sections so I have one image that has all my assets, one area and then I'll have another environment that shows the trees and plants and then I have another image of the houses and buildings that I made during This project.

After I made the picture of all the assets I needed to create my other two pictures for the unity scene, the next one is the plants and trees I started out by adding a cube and went on proportional editing objects to increase the height so look like uneven ground and for the plane I also cut at the faces and ease the proportional editing objects increase the height so look like a hill then I went into the particle system, to create the grass using single or slight use for the all assets picture went on to particle system hair and put the grass as my object that’s looking like a grassy hill.
After I created the grass I added the assets into the scene and put another cube over the scene darkened it so that the light would be absorbed I included six light into the scene.
Light 1, 2:
colour:
H: 0.628
S: 0.348
V: 1.000
Power:
8786.9 W
Radius:
19.4 M
Light 3, 4, 5, 6:
colour:
H: 0.628
S: 0.348
V: 1.000
Power:
8786.9 W
Radius:
3.1 M
Ground cube:
colour:
H: 0.108
S: 0.654
V: 0.727
A: 1.000
Dark cube:
colour:
H: 0.745
S: 0.551
V: 0.906
A: 1.000
References
Thomas, K., 2021. 15 Bark reference moodboard ideas in 2021 | tree bark, tree bark texture, tree textures. [online] Pinterest. Available at: <https://www.pinterest.co.uk/kaiathomas00/bark-reference-moodboard/> [Accessed 3 June 2021].
Comments